A short history of mouse fur at Sony Pictures Imageworks.
Rob Bredow is an executive creative director and head of ILM. Some two decades years ago, he effected animator lead on Stuart Little at Sony Pictures Imageworks, a studio where he would go on to be a VFX supervisor and chief technology officer.
Stuart Little, directed by Rob Minkoff, was one of Imageworks’ first big creature shows, and they had to tackle fur in a major way. After the film’s release, at SIGGRAPH 2000, Bredow presented the studio’s work on rendering the fur in RenderMan. A highlight of the presentation was that the actual fur surface shader (along with some other shaders) were published in the accompanying SIGGRAPH paper.
For the 20th anniversary of Stuart Little, I sat down with Bredow to look back at that time at Imageworks, including how fur was approached and what other challenges the film threw at the team.
b&a: Had you come to Imageworks just for that show or had you already been there for a period?
Rob Bredow: When I started at Imageworks, Stuart Little was my very first show. In fact, there were two big shows going on at Sony Imageworks in that timeframe. They were Stuart Little and Hollow Man. They asked if I had a preference and I said I would like to work on Stuart Little because it looked like a lot of fun.
b&a: In some ways, Imageworks hadn’t really done, until then, any big creature shows – maybe Anaconda and Godzilla – had they?
Rob Bredow: Imageworks had recently done a lot of work on Starship Troopers, but of course the creature work was done by Tippett. So, yes, as far as I remember this was the first major effort, and of course this character was the first digital character to lead a live action movie. So it was a big, big step.
b&a: OK, so you jumped into doing this furry creature, and Imageworks hadn’t really tackled that kind of thing before. There’d been a few furry creatures done maybe for Jumanji and Mighty Joe Young by other studios, but what did you know about furry characters at the time?
Rob Bredow: I had very little experience with this type of character coming onto this project — this is a lot different than Godzilla! [which Bredow worked on at VisionArt]. Plus there was cloth on top of the fur. It was really about figuring it out for the first time for many of us on the show. There were four CG supervisors on the show (Bart Giovanetti, Jay Redd, Bret St. Clair and Scott Stokdyk) and each one of them took a different big problem area.

b&a: I find that so hard to fathom – as a visual effects studio, and even as an individual – that you hadn’t tackled fur before for such a central character. But that was kind of the nature of visual effects back then, I guess.
Rob Bredow: That’s right. Just doing photorealistic CG characters at all was a relatively new thing. So the idea of having furry creatures on camera for this kind of running time was completely new. And even years later when we did Stuart Little 2, that was the first time we had done feathers at Imageworks, another brand new challenge. This was the era where you were doing a lot of things for the first time we just take for granted today.
b&a: How did you then begin immersing yourself into the idea of simulating fur?
Rob Bredow: To start with, my main job on the show, actually, was as an effects animator. I was mostly absorbed in all of the things that were not the mouse, that were accessories to the mouse like bubbles, water, and footprints. I was writing those systems and doing a lot of those shots and it was really my main job. I probably spent 70% of my time doing that. But the people right around me, some of their main jobs, were working on the fur, working on the cloth.
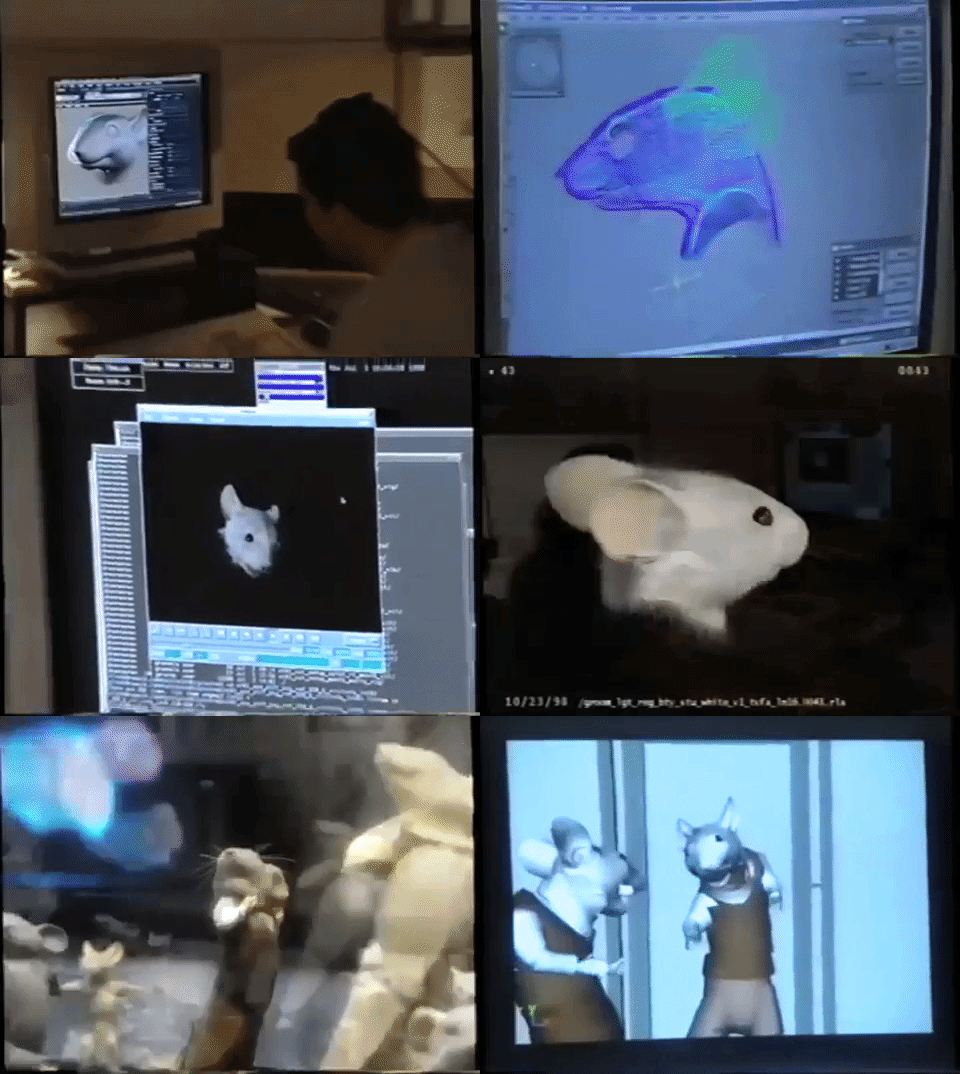
Clint Hanson was the main shader writer who was in charge of writing the shaders for Stuart’s fur. He tried a lot of different models. There were models in the research that came from various papers and Kajiya Kay does a good job of approximating lighting on a cylinder without having to manually do all of the integration of all the light from all the directions. That’s the place we started, but the interesting thing was, especially at that time, it was really expensive to turn on the fur.
As Clint was writing the shaders, with the Kay model we weren’t quite getting the kind of intuitive lighting lighting response that we needed. We needed the shortcut of being able to light the skin, then turn on the fur and have the fur light approximately the way the skin was lit. In fact, in our early implementations, the fur was instead dark where the skin was light and was actually picking up more light around the terminator because that’s actually how cylinders work – when they’re pointed perpendicular from the light, they’re going to pick up more light. It wasn’t intuitive at all.
So, we came up with this hack in the shader that steals the lighting from the diffuse lighting of the skin as its initial lighting component. That’s what the base of the fur is lit by, and then as you get more towards the tip, it fades to a more accurate cylindrical shading model. You have controls in there for how much of that you want to use. It ended up looking pretty realistic even though it was a complete hack. It was primarily invented to make it easier for the lighting artists to light the skin without fur and get a predictable result when you turn the fur on. The truth is our lighting models at the time weren’t all that accurate, but they were really useful!

b&a: What kind of development work had been done to show this was going to be possible for the movie?
Rob Bredow: A Stuart Little screen test had been done before the movie was greenlit because they wanted to see what the mouse was going to look like. That test was done before I came to Imageworks, and in a system almost completely different than the system we eventually made for the film to get a result as quickly as possible.
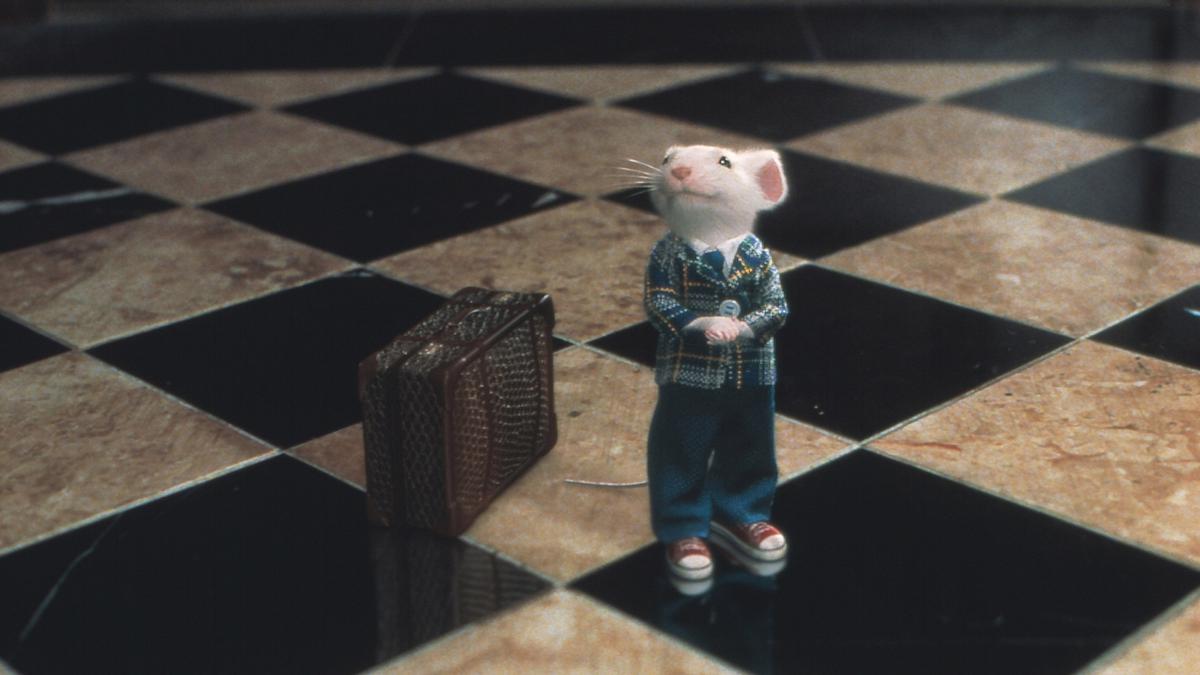
I would say the biggest question the test helped answer was whether the character was going to be appealing rendered as a 3D animated character. The character design wasn’t final in that test, which had him walking up to a mirror, straightening his bow tie. He looked charming. It helped get the film greenlit, and then it was time to figure out how we were going to do hundreds of shots at that complexity.
b&a: What was it like, then, when the shoot began and you were still doing R&D for how to get this mouse and fur and cloth made?
Rob Bredow: It was interesting because we were working from storyboards for a lot of sequences before the background plates had been shot. The legendary John Dykstra was visual effects supervising along with Jerome Chen who was an experienced VFX supervisor at Imageworks. And they were off photographing the show. But of course there’s a difference between what you plan for in the boards and what actually happens on the set or on the location. The atmosphere back in the studio was definitely one of ‘scurrying’ to get things ready.
There was, for example, this whole sewer sequence, which was one of the things I was focused on, where Stuart was going to get washed down the sewer and over this waterfall. John Dykstra, for good reason at the time, decided to shoot most of that miniature. So I still did a lot of interactive splashes and we replaced the water right around where Stuart was, but we didn’t have to do the whole thing in CG.
b&a: Aside from the fur shader, what were the other shaders Imageworks released?
Rob Bredow: The deformation shader was a displacement and a diffuse shader for all the little footprints. We were actually using that defamation shader where there was live action photography of carpet or a rug or something and Stuart needed to leave footprints in it. So we would deform – basically morph – the plate to do highlights and lowlights to shade it to make the footprints more believable.
Then there was a contact shadow shader. It’s so funny looking back at these now. These are just ‘sausage’ shadows – we do them in every movie right now. We calculate them a completely different way. But this was the first time, that I’m aware of, where we had a custom shader just for giving us that ‘sausage’ – that soft shadow of contact below the characters. We couldn’t do it with indirect illumination. Today, ambient occlusion would give you a much better look. But this was a way to project the mouse down into the plate and get a nice blurry shadow below him quickly.
b&a: What do you remember was the reaction to releasing the shaders at SIGGRAPH? Because that’s kind of cool you did it, and I’m not sure it happened very much.
Rob Bredow: It was a big deal and there was a lot of internal discussion at the time about whether we should release them or not. It ended up working out really well. Sony was supportive of us releasing it, and then when we did it, it did seem like it was a big deal. We got a lot of response on the day at SIGGRAPH, and then in the next five years, a lot of people would write in who were doing something similar or were inspired by some of the work.
Even as recently as a few years ago, I would get a message from a student looking at the shaders and I’d reply, ‘You really don’t want to use this model anymore. This is a hack. It was really suitable back in the year 2000. It’s almost 20 years old now. You want to use something else.’ But it was really fun to see that it did have a really long life and that people were inspired by it. It was a great way to give a little back to the community that has inspired so much innovation in computer graphics.

b&a: Fur was obviously the big challenge, but then there were these other things like Stuart getting wet and now you have clumping fur. How did you tackle those extra things?
Rob Bredow: The clumped fur was really fun. That was an area of research that Armin Bruderlin and Bob Winter did a lot of the work on. They really analyzed the reference photography and came up with this clumping mechanism that had stuck a bunch of hairs together around a key hair that was identified for these droplets. What was really interesting, I thought, was how once you layered in those kinds of effects on top of the rest of what we had established in the fur system, it actually made the fur even more believable than it was when it was dry and cute.
b&a: Also, Maya was only very new then, wasn’t it?
Rob Bredow: This was very early days for Maya. This was before cloth was available in the commercial version as well. I believe we were the first ones to use that cloth simulator in a pre-release state. The cloth simulator was not like cloth sims are today which are powerful and stable by comparison. There were a lot more challenges on Stuart and the cloth sims would come out a lot rougher with a lot of noise and popping. There was no mechanism in Maya to easily filter over multiple frames. But, the solver had a cloth cache format where the cloth artist would dump out the sims as a cache out to disk and we would use those and load them back into our renders.
I wrote a cloth cache processor, and an input and an output node for Houdini, so I could load in the cloth caches that we’d saved out and then I could process the cloth in multiple ways in Houdini. Houdini’s Chops was relatively new, but it was really useful as we could load those sim’d caches into Chops, do the signal processing, time filter out some of the noise and be able to dump it back out to disk and use that as a new input for a render or further input to blend into the final cloth result.
Once I had that filtered cloth written back out as a new cache, the rest of the cloth team wrote a new ‘cache compositor’ in Maya. With that tool, you could load up multiple caches and then blend between them. You could use one solve for one section of the cloth and another solve for another section of cloth.

Before we started the show, I think we had hoped — maybe naively — that once we got the simulation properties set up for a given piece of clothing, we could just run the simulation, that it would be part of the automated publishing process. But it turned out we needed a small army of artists to simulate all the cloth in all the shots and blend it all together into the final result. It was a labor of love.
b&a: When I’ve covered white furry characters since this film, I always hear that they’re the hardest things to render because of the bounce light etc. Did you ever wish the mouse wasn’t white?
Rob Bredow: Ha! The only problem we were trying to solve for was the white mouse. Actually, our shading model was in large part driven by the fact that it was white fur. Later, when we went onto our next show, and it had a monkey with black fur, with all the specular and different diffuse response, our existing models were only barely a starting point. The Stuart model, which was this hacky illumination thing with normal fading between the skin illumination direction and where it would be in a more accurate model, it only worked well for Stuart because, theoretically, when using the skin illumination, it’s kind of the same as using bounce light. It’s not accurate, but it’s accurate enough to give you a somewhat intuitive result.

b&a: I always thought with Stuart Little that maybe one of the things that may have helped ensure you stayed ‘photoreal’ was that there were real cats used in the production, so you actually had real fur on the screen to reference. Was that the case?
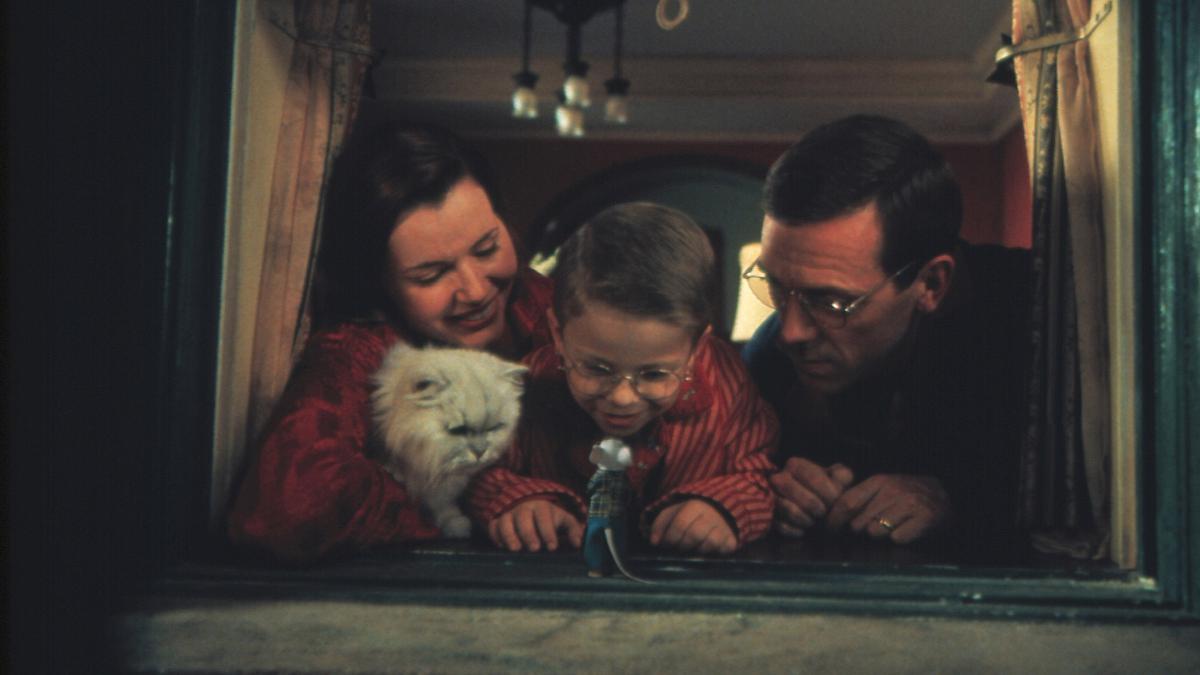
Rob Bredow: Exactly. John Dykstra would sit in dailies very often and call out these dark accumulations, places the shadows seem to be accumulating in the fur. We’d have to come up with techniques to get rid of them. Sometimes you could just lighten in the comp, but very often you’d have to go in and put a special bounce light in there or adjust your shadow densities. This was at a time where we were still rendering depth maps. These were traditional depth maps with one depth per pixel, not deep shadows like we have today if we need them. So you would have to tweak your blur and your biases on your maps to try to avoid getting these unsightly dark accumulations so that the mouse standing next to the cat was going to be as believable as possible.
The other thing was, of course, this was all on film. So you would race every night to get the digital files rendered and off to the lab by 1 or 2 in the morning, so they could be processed and you would get back the prints by 10 or 11 in the morning the next day.
And then they would come back a different color every day! So, there’s a lot of nostalgia these days for film. But from a standpoint of working with it every day, you get one iteration a day and you’d get it back and it would be a few points red, or green or magenta. So, you go look at your white mouse and you’re like, okay, the white mouse is green today. Well, so is the cat, so is that a render problem or a film print problem? Sometimes we were stuck striking a new print with new timing lights so we didn’t have to just guess!
b&a: That’s hilarious. However, is it possible that back then because you only got one iteration and had that ‘processing’ time, there was a different way that shots were considered? Now we can do a million iterations, it’s a good and bad thing, isn’t it?
Rob Bredow: The fact that you can turn stuff around in an hour and get another round of notes does sometimes mean you just get more notes. At the same time, everything then was so much slower. We were lighting in an early version of a lighting package called Birps at Sony, which was basically a fancy rib (Renderman Interface Bytestream) editor with a programming language built in. There was a window that gave feedback when you kicked off a render so you could see the render buckets come in.
For ‘speed’, you could slave multiple computers to your machine so you could get buckets back in just 20 or 30 or 40 minutes. That was with multiple computers working on your one interactive render for one frame. But it took many hours to do one mouse with a few hundred thousand hairs – I’m sure we could run that same lighting model today in real-time, or close to it.
b&a: Tell me more about Birps.
Rob Bredow: ‘Sprib’ was Sony Pictures rib format. It gave us the ability to insert procedurals and Sony Pictures scripting language into our ribs. Sprib could be processed into a rib file which could then be ingested by RenderMan (even on the fly). ’Birps’ was ‘Sprib’ backwards and it was basically a Sprib editor. Later, Katana was a big upgrade from Birps for all of us.
b&a: What do you remember would have been some of the director or VFX supervisor notes about ‘fur’?
Rob Bredow: There would be comments about how dry the character was feeling or whether he had enough sheen. To be honest, the majority of the notes were more basic lighting notes than we even think about today. So John Dykstra would frequently call out the dark accumulations where the shadows looked like they were accumulating inaccurately. There would be a lot of discussion about detail. It would be rare to get shadow detail from hair to hair, and if you were getting that, then you’d probably get some artifacts with it. It was a trade off to get the right detail.
A lot of our conversations was about how to get the right amount of detail in the mouse, avoid the dark accumulations, and then of course, shape the mouse to make him look great. We were shooting chrome and gray spheres on set, so we had reference and that was important to integrate the mouse into the set, but he also had to look like a movie star. The DP gave us a good starting point, including by the way, he would sometimes light the little stuffies, but he’d be also lighting the rest of the set and the real actors.
I remember John Dykstra frequently asking us to kick up that ‘back cross’ — where we needed to kick up that rim light, always making him look charming like a movie star.
Rob Bredow’s website still has his Stuart Little fur rendering notes available, while a PDF of the ‘Advanced RenderMan 2: To RI INFINITY and Beyond’ course notes from SIGGRAPH 2000 is available here.


