“You have to fight for your data.”
During production, it’s likely that many members of a film crew will be scrambling. Scrambling to build and decorate. Scrambling to get props ready. Scrambling to record the best sound possible. Scrambling to finish a shot before the sun goes down.
There also tends to be one type of crew member or members scrambling in a different way; to survey, photograph and scan sets in the limited time available, and in a way that does not slow down or inhibit the production.


That particular role goes by several names. For ‘Lidar supervisor’ John Ashby of Aura FX, the role essentially involves taking 3D volumetric scans of sets and locations, as well as capturing photographic textures of the same places, and then handing off the data to production or a visual effects studio for use in several ways during post, such as camera matchmoving or building digital set extensions.
It’s not an easy job, as Ashby can attest. There is often next to no time to get in with his equipment to capture scans and textures. But it is a crucial one, for both VFX-heavy and even ‘non-VFX’ films, since that kind of data can help in numerous ways in shot production and even ‘manufacturing’ shots that could not be achieved in principal photography.


Here, Ashby shares the art of Lidar scanning and capturing texture photography, based on his experience from such films as Joker and John Wick: Chapter 3 – Parabellum.


The gear
John Ashby: Basically, you are just always carrying lots of flight cases! I have a couple of scanners. I have two small Faro S Series scanners, which will do 70 and 150 meters respectfully, and I have a Leica ScanStation P50, which goes all the way up to 1,000 meters! The data from the Leica is unbelievably clean, it’s really fast but it’s a 30lb monster to lug around, the Faro, on the other hand, fits in a carry-on.
The way that Lidar works is that it fires a laser up into a spinning mirror and in turn, the scanner rotates around in a circle, this results in a creating a 3 dimensional volume of point data.
The resolution of the point data is calculated per 10 meters, the higher the resolution the slower the scans are. So, in typical production use, the Faro scanner will do 1 point per 1.2cm at 10 meters – 1 point per 2.4cm at 20m, 1 point per 4.8cm at 40m and so on. The way I have the Leica scanner setup is at a resolution of 1 point per 0.6 centimeters at 10 meters. So it’s double the resolution of the Faro but it’s also twice as fast. It’s certainly not fast to move around – because it’s a big ole beast – but you’re capturing more data in a lot less stations.


Then you have a quality setting on the scanner that controls how many times the laser strikes an object. The faster the scanner moves, the less times it’s hitting the surface of something. Which means it’s going to run slower when you ‘up’ the quality sampling because it’s hitting the same object two or three or four times it’s able to average out the reading to give a more accurate result. If you don’t have a high enough quality setting, it will just come back with too low a reading saying basically, ‘I don’t know what that is.’ And it will often just leave it as a black hole in the data. Give it as higher quality and more difficult / reflective surfaces can be captured.
Then it’s onto capturing the textures, the good thing here is you’re not lugging around the Lidar scanner, which is great. It’s like a little reward. All of a sudden, it’s just you and the camera.
You also really need to log down what’s happening, because if you don’t, it’s very easy to lose track of what you did. Especially if you are handing that data off to somebody else to process. That process took me a lot of trial and error to go from what started as just noting down in a notepad to eventually a custom FileMaker database that I can log into on my iPad Mini right there on set.
Scanning: a methodology
On set, it’s all about what’s the most data you can get in the fastest amount of time without holding up the production and pissing everybody off.
For Lidar scanning, I tend to start with a quick blitz of the particular environment to get a ‘registration’ of it. This is just lots of fast low resolution scans; it’s just so I know in the worst case scenario, I’ve got a full registration of the environment. Then I’ll go around and do my luxury scans from different ‘stations’ where I will basically do the same thing again, but I will do it in a way that I’m windowing specific areas and up’ing the resolution and sampling quality in order to get the more distant and reflective surfaces.
For photographic textures, I generally try and do these when it’s overcast. You’ve got two options with textures. Either you have to do them in the exact light they were shot with the main film camera, or just get them in flat light, which is a lot more helpful for everybody because then in ‘CG land’, they can re-light them however they want. Painting out shadows is a painful process.
I also have a robotic panoramic tripod head, which allows me to capture gigantic resolution panoramas and leave it relatively unattended – then with my other camera I can get the photogrammetry. I try and grab flat tiles first. I will take an image down, middle, up, and then take a step, and go up, middle, down etc. In the case of HDR textures, it’s grabbing 3 bracketed images: two stops under and two over.
I try to capture everything as if it’s going to be a digital environment, even though sometimes it’s not needed as that, so they might only ask just for the Lidar. But I’ve been caught out enough times where they’ve said it was just for matchmoving, then three months later you get this phone call and they’re like, ‘Hey…so…you didn’t take any textures while you were there did you? Because we’ve got the edit now and we realize there’s no shot that joins this thing to this thing and it needs to be a VFX shot.’
Just to note, while it’s possible to take color scans with Lidar, the imagery isn’t of a high enough quality for use in a texturing pipeline, not to mention that it also slows down capture time considerably – so I generally just stick to non color scans, and instead use the textures from a DSLR.
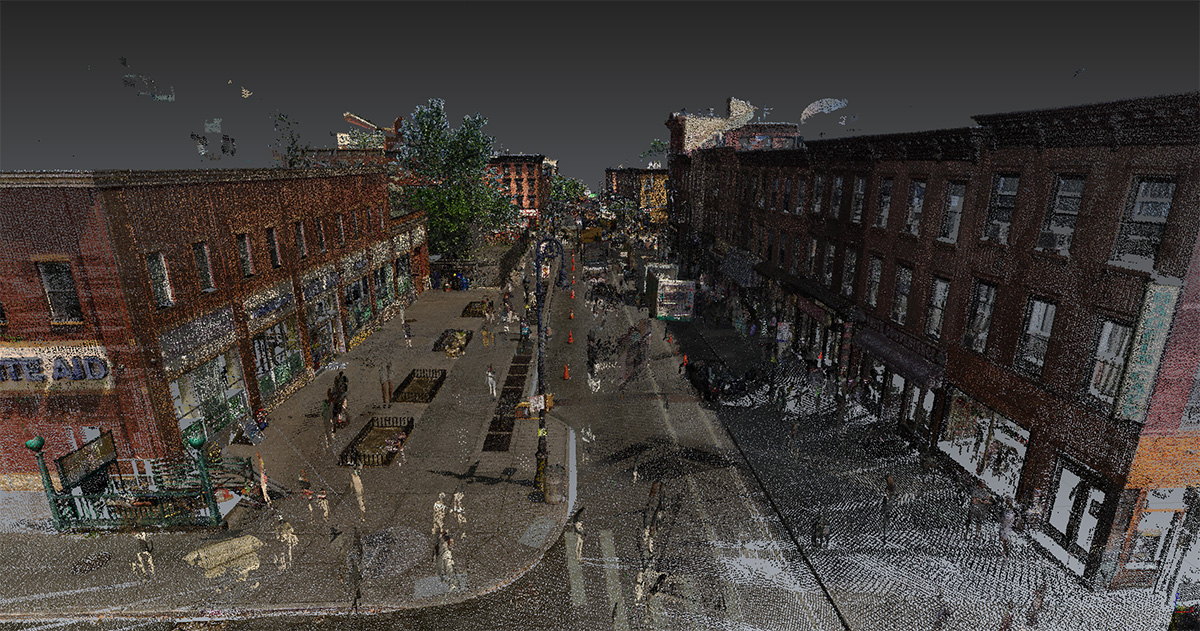
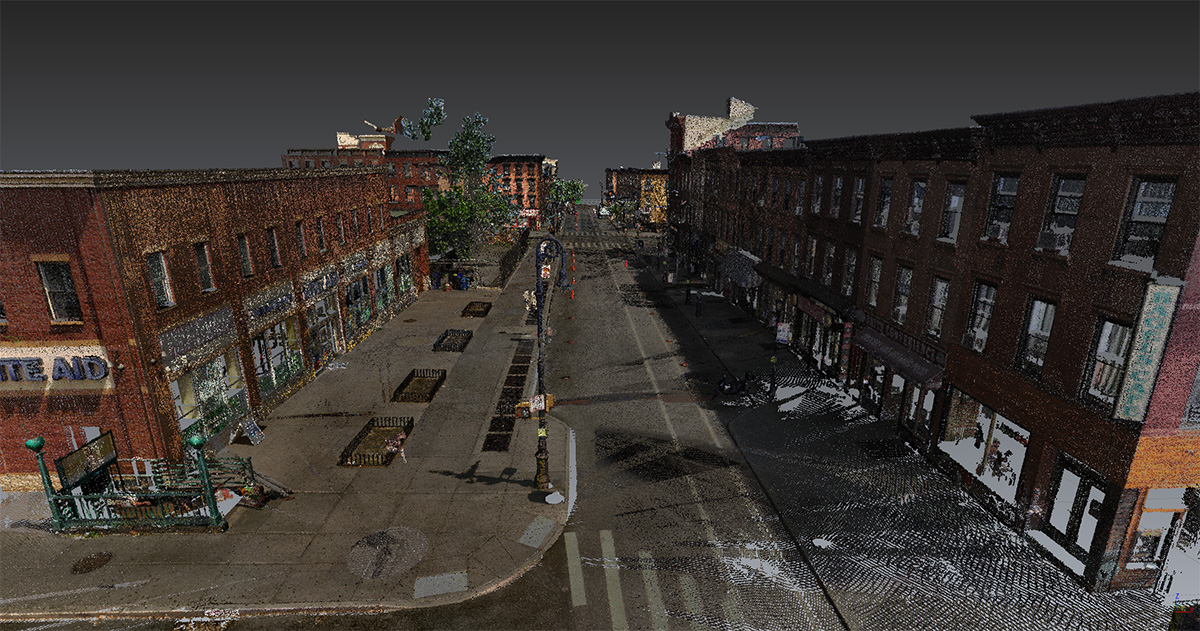
A quick visual guide to Lidar scanning from Aura FX


‘Lunch breaks are always good’
You’ve got to think on your feet. You’ve got to get out and get the data however you can; not get in anyone’s way, and try not to hold up production, sometimes even grab your scans between shots while the crew are reassembling. You might get the luxury that they’re going to hold the set for you. But they’re only going to hold it for, like, a minute. Lunch breaks are always good for scanning. You have to fight for your data.
Recently I was on a set where we shot for six hours of daylight and it was kind of sunny. And then you see the clouds come over and you’re like, ‘OK, now’s my chance. I’ve got to get my texture photography. You put the scanner down and just go out and blitz it with photography.
The hardest thing to scan
Glossy black surfaces are the bane of what we do. I have, for example, some really cool scans from skyscrapers in New York, and you’ve got all these buildings in beautiful high detail and then there’s this building in the middle which is just nothing! You just get the frame, like the outline of it. The building is that black reflective glass, essentially a mirror. Scanners don’t work well with mirrors. It just fires a laser off out into infinity and doesn’t understand what it is.


You’ve captured the data, now what?
I use Leica Cyclone for registering the scans together. Sometimes the registration is automatic, but I always like to QC what’s happening and get in there with visually aligning the scans.
If you’re scanning in a room and the building is almost symmetrical, automated software processes really struggle with that. It tends to assume the scans are going to be taken in a particular order. It expects scan 1 to be next to scan 2, and so on, but sometimes you’re on set and it they shout cut and swing around the camera and realize that you’re in shot, so you have to just get out of the way. And then you’re like, ‘OK, cool, I guess I’ll go off and scan on the other street instead.’ So all your scans can get really jumbled around. So a good logging system is key and then it’s much easier when you have to manually align your scans after.

The Cyclone software package is very fast for that. You just overlay them on top, you quickly just line them up and that’s pretty much it. And then it will snap it and then it just does a fine registration on top. You can get through about 80 scans in about a couple of hours.
Then I go onto a process known as “cleaning” the data, to remove crew members, reflections, general noise and optimize the data for meshing. After that I go to Reality Capture or 3DF Zephyr where I mesh the point clouds and align it with the photogrammetry data. After that, it’s off to ZBrush to fix any issues, and then Maya to do any retopology.
Mapping textures to the mesh
So, for textures, I have a custom suite of tools that I have built allowing me to work with high dynamic range imagery going directly from 32 bit DNG files to floating point EXR files, then I’ll stitch them in PTGUI. Recently I’ve been using the FlowEngine SDK from 3DFlow which allows me to align my spherical images to the scan data and create FBX rigs of the cameras.
The people at 3DFlow are amazing and have been incredibly helpful and responsive as I built out these tools and had to request certain features that weren’t previously available. Then I have a custom batch processing toolset that has allowed me to automate the meshing and texturing and it produces all my various resolutions, too.

Where the data goes
I typically hand off everything to production or a visual effects studio. The most frequent ‘package’ that gets sent is three different resolutions of meshes; low quality, medium quality and high quality. But these deliverables can often change with the vendors requests.
I provide OBJs, and sometimes Alembics. OBJs are pretty unbreakable as a format and generally the most requested deliverable. They’ve been going for years. They’re not light, they’re pretty heavy as in file size versus Alembic. But you never have any problem opening them, so they’re a good transfer format.
Joker: what was scanned
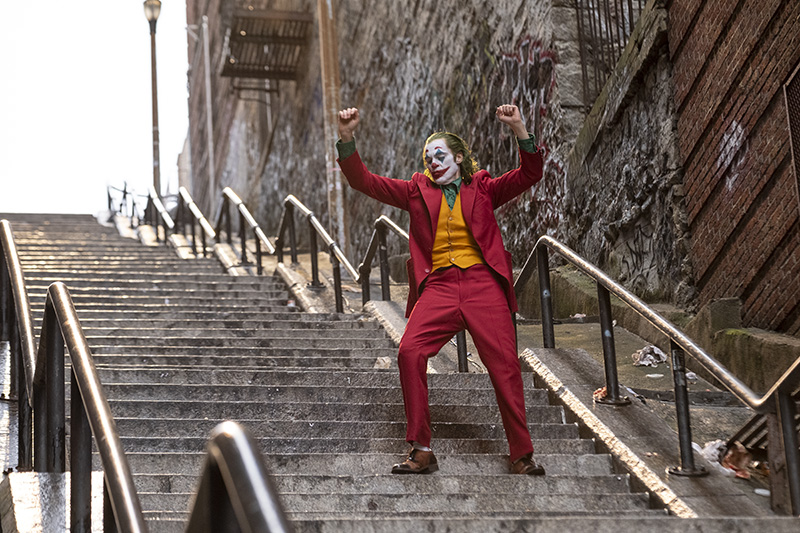
I worked with visual effects producer Brice Parker and visual effects supervisor Edwin Rivera on Joker. There’s always going to be a lot of clean-up with these kinds of ‘period’ films, especially set extensions in New York. Every week it’s either something’s burning down or catching fire, or being constructed. Parts of New York from just three years ago can look very different to the modern day. And then Joker had this pseudo-period that was maybe the 70s or 80s. It meant there had to be a lot of stuff that had to be painted out in the background or replaced.

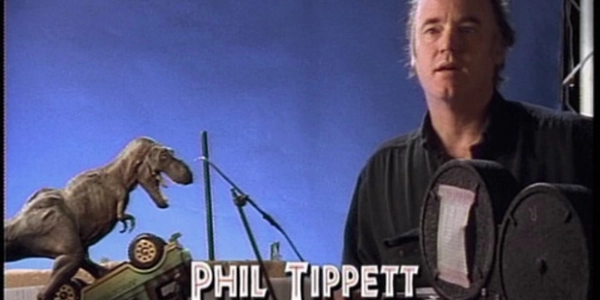
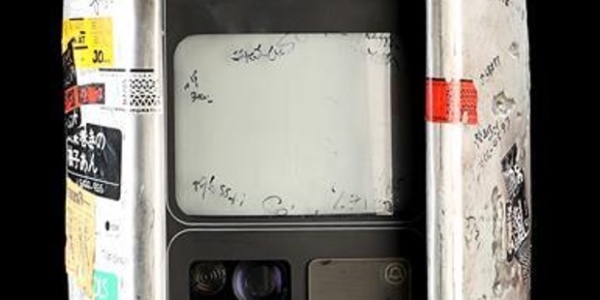
I scanned a lot of sets, including Arthur’s apartment, and the TV set for the Murray Franklin talk show which I scanned because there was all this CG blood that had to get added in post and this allowed them to get a perfect camera track of those sets. I also scanned the subway railway car set. Again, there was all this CG blood and it was about helping them get a perfect match move to stick up against the windows and walls and match everything perfectly. Also, having continuity between shots can be really important. There’s a lot of cuts in that scene so it’s great having a match move that’s accurate; what it means is that the blood in shot A lines up perfectly with the blood in shot B.
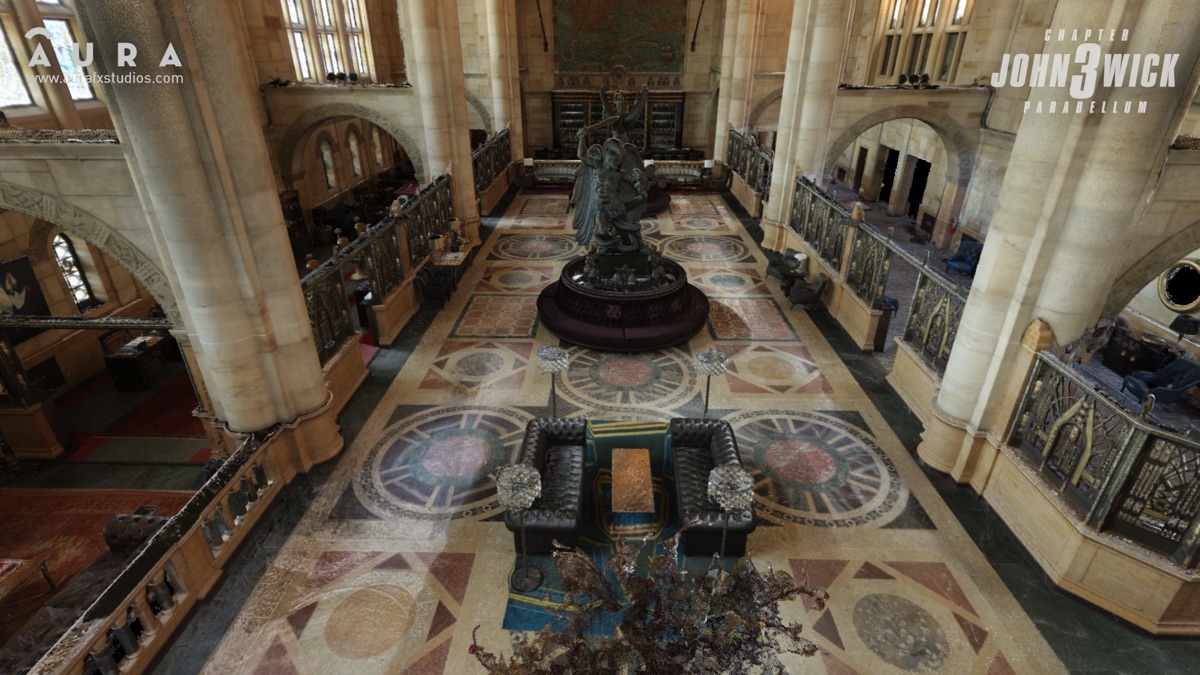
John Wick 3: the Continental
I had just four hours to scan and photograph the building for the shoot-up of the Continental. The building was One Hanson Place in Brooklyn which is huge. It was just a pure race against time. Each scan was set to like a minute and a half or two minutes. I took a scan every 5 or 10 feet, then I had to rush round and get all the photogrammetry and HDRs. The clock was just ticking down and people were gradually trickling in in the background. I had someone from production who was helping me keep people at the back, but you can just feel there’s this building sense of unease behind you as you are finishing up – no one likes being held up by VFX!

The scene itself was going to be shot at night. It’s where the lights go out and the Ghost Recon enter and they start shooting up the place. The scans were used for matchmoves. All of the bullets squibs and all the fluff from the sofa – that was all added later.
What Lidar really helps you do is, when you’re working on multiple shots from different camera angles, you can track everything to the Lidar data and it snaps all the cameras into the same world space. So, because all the points are essentially geo referenced, it allows you to solve a bunch of shots into a single world, which means that if you put something in 3D space in one shot, it will be in the same 3D space in all the other shots.
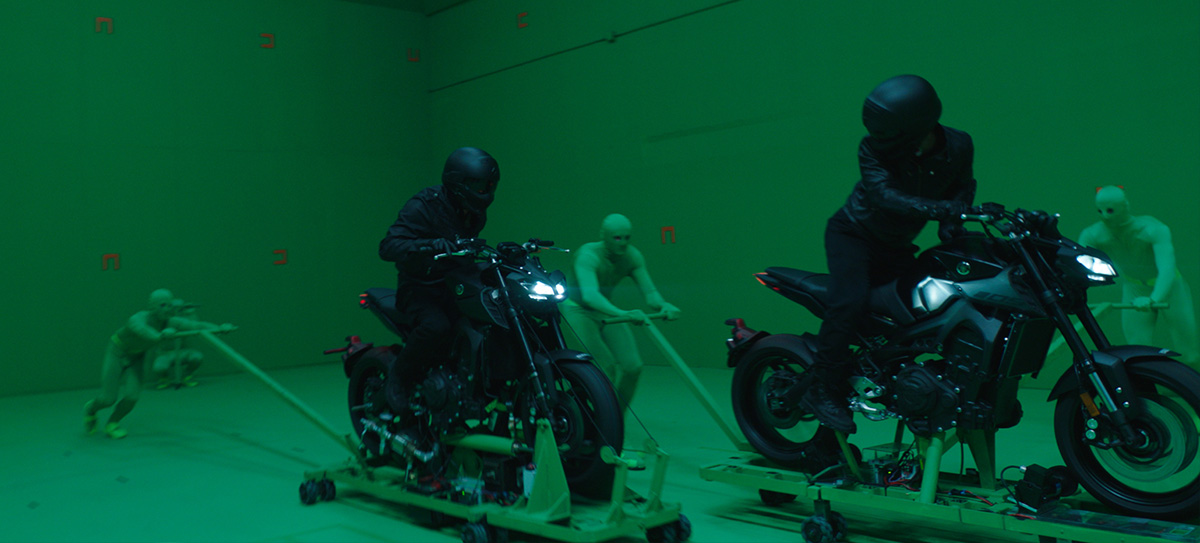
A test alleyway
For John Wick 3, we did this test alleyway for the shot where John gets shot and falls off the rooftop, which was a different alleyway. What they did for that was a stunt shot on bluescreen and then put that into a fake alleyway. The VFX supervisor, Rob Nederhorst, knew that the shot could be done, but he had to show everyone how it would work. He needed an example to say, look, I’m going to show you that we can shoot something on bluescreen, we can go scan an alleyway, photograph it, rebuild it all digitally, and it will look real.
They knew they couldn’t do the shot practically, ie, finding a suitable alleyway, especially because of the height that he had to fall from. So Rob had me scan an alley, then scan another alley, and he could then staple the two together in Maya, and show the director. It was basically a proof of concept of how the final shot was going to be.
Deleting the ‘gak’
One of the most time-consuming scans I did on John Wick 3 was for the 3 story glass office. The set decoration crew were all there with their equipment, everyone was working hard to get the set ready for the next day and I just had to get these scans, even though it was so full of people. So the data was just a mess of people, production equipment, reflections etc. and I had to go in there and clean all the noise out of the scans.


Usually, providing you’ve got multiple scans, a lot of the time it doesn’t matter if you’ve got somebody walking through one of the scans because you probably find that in ‘scan B’ that that person’s not there. So you can essentially just either cut off everything above the ground plane in the scans, or you can just delete the person out of one scan, but in this instance there was never a single purely clean scan there was just a constant trail of lidar ghosts just scattered throughout.
Perhaps the most challenging scan was with the additional photography unit and we were getting the entrance to the Manhattan Bridge for the bike chase. I’d only gotten about five scans then a polar vortex hit and the temperature dropped to something crazy like −27°C (−17 F), I’d never been so cold.
The crew had hand warmers on the camera to keep it working, but unfortunately my scanner switched off and I had to wait inside a nearby Popeye’s trying to warm it up so it would reboot again but it just would not happen. Luckily we got the five good scans to Image Engine who said they could work the data and the shots came out looking really great.
Other times you are just waiting for your moment to get the scans, like when we did It was this dirty, horrible alley out the back of Grand Central. I think it was about 100 degrees in New York and there was this smell of hot garbage. It was like, ‘This is the glamorous life of the film industry right here!’

Got a question for John about his 3D scans? Ask him on Twitter.